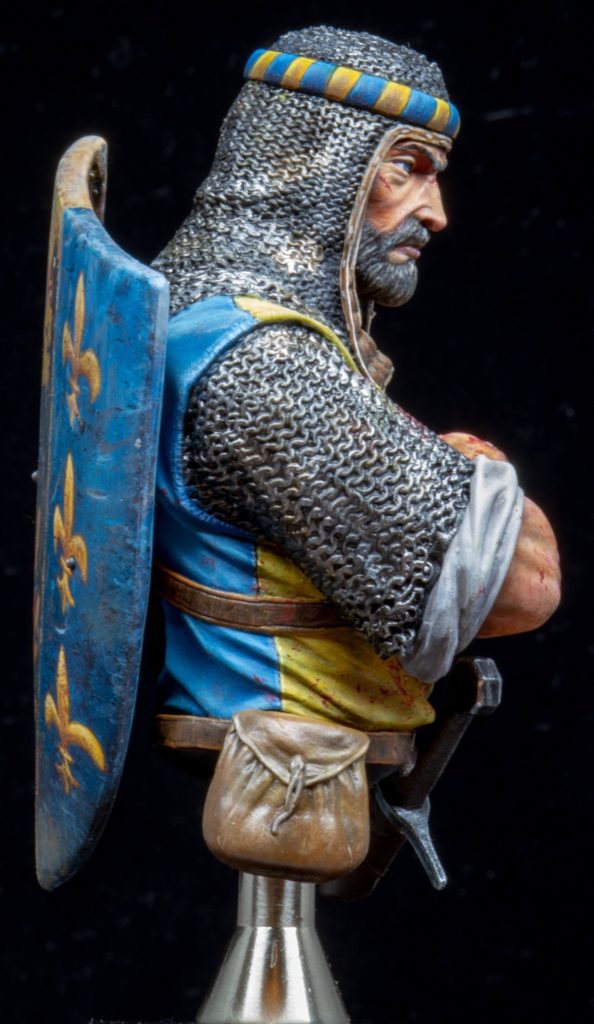
This is the final post on the project and it’s about painting the shield. As I said in the previous post, I decided to stick to the original box art which is very nice and shows the Charlemagne coat of arms.
I begun painting the field with two colours, using a desaturated yellow and a desaturated blue which I obtained mixing a grey into the yellow and blue. I created some “effects” to simulate an old shield using a small piece of sponge (the one of the miniature boxes…) which I dipped into the paint, unloaded a bit on a piece of paper and then using the sponge to stipple the surface. This method is quite powerful and I am planning to use it more in the future.
After the base fo the shield, I started the process to paint the coat of arms. The process is a “mixed” one, that is I used the computer and of course the freehand painting.
Initially, using a pencil and a piece of paper, I replicated the shape of the shield onto the paper, then I took a photo with my cell phone and converted the photo into a vector image (svg format) using any online service available for free.


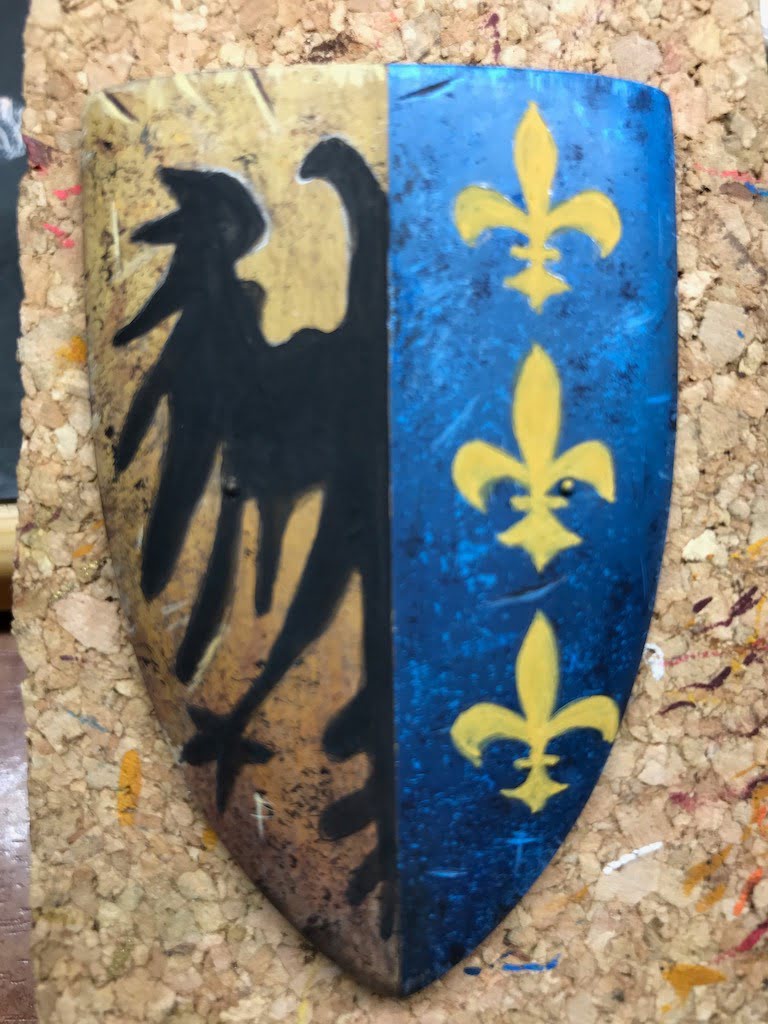
I searched on the internet some vector images that were similar to the box art and using any graphics program, I merged the shield shape, the half headed eagle (symbol of the Holy Roman Empire) and in the sinister half, three fleurs-de-lis (France symbol).
I printed the “merged image” considering the exact vertical size (I used PowerPoint, but you can use any graphics program), then I cut the shield leaving a border around the shield shape (see the picture). Using a black, soft and thick pencil, I coloured the back of the paper to have some pigment to use in the transfer process. I overlapped the paper shape over the shield and then, using a standard ballpoint pen, I inked the eagle and fleurs-de-lis transferring the coat of arms onto the painted shield.

Leveraging on the transferred pencil stroke, I finally painted the eagle in black and the fleur-de-lis using an ochre colour. After that. I painted the details as shown in the pictures.

I added more details like shadows and scratches to simulate an old shield and of course I painted the back of shield.
In this case I decide to use oil colours, starting from an acrylic base coat. I didn’t paint too many details as the central part of the back of shield is actually covered. The picture of the back is not great as I took the picture when it was still wet.


Ok, that’s all about the painting process of the shield. I have to say I really enjoyed painting this bust and I wish to thanks Marco Ganghini of Bestsoldiers (http://www.bestsoldiers.com) who produced this masterpiece.
As usual, below you can find a gallery with the pictures I took from several perspectives, including some details.
See you next time and good painting!
Luciano